Both Jess and I are highly creative and crafty so we decided it was a good time to try something new. We finally decided on lady bug nail polish and I thought I would share with you today our process.
Please note that this was an experiment for us and as you can see it may not all be perfect but I didn't think that would matter! We just gave it a go anyway and we were quiet happy with the results. I would also love to hear your comments, things you tried differently and I would especially LOVE to see some of your finished results!
Tutorial
Don't forget to wait between each step for the nail polish to completely dry!
 |
| Step 1 |
Step 1:
This step is nice and easy...
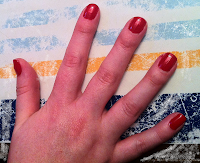
Paint all of your nails red!
Step 2:
 |
| Step 2 |
Add all the black.
a) I started with the black dots first
b) Then the black for the head at the tip of the nail
c) And Last I added 2 small lines on each nail for the feelers
But you can do it in any order that works for you!
 |
| Step 3 |
Step 3:
Add 2 white dots to the black head of each lady bug.
I found it worked better when a little black 'line' was left in between.
 |
| Step 4 |
Step 4:
Add little black dots for the eyes!
Step 5:
Paint a layer of clear nail polish over the top.
Step 6:
Clean up around your nails... a good and easy way to do this is to use a Q tip dipped in nail polish remover. Carefully run it around the skin near your nails making sure you don't remove any of your hard work on your nails!
Id love to hear how you all went! pictures, comments, advice and tips all welcome!
